![]() February 17, 2016 21:35
February 17, 2016 21:35
![]() February 12, 2016 08:44
February 12, 2016 08:44
![]() Blogger
Blogger
CS 2420 - Assignment 4 - Part 1
The assignment is split in two parts, first I have to rewrite all my sorts that I've done in past assignments but I have to implement an interface on each sort.
So far I have finished most of the sorts and implement the interface on each. Here is my Quick Sort for reference:
class QuickSort : ISorter
{
    public void sort(int[] numbers, int low, int high)
    {
        if (low < high)
        {
            int pivot_location = partition(numbers, low, high);
            sort(numbers, low, pivot_location);
            sort(numbers, pivot_location + 1, high);
        }
    }

    private static int partition(int[] numbers, int low, int high)
    {
        int pivot = numbers[low];
        int wall = low;
        for (int i = low + 1; i < high; i++)
        {
            if (numbers[i] < pivot)
            {
                wall++;
                swap_numbers(numbers, i, wall);
            }
        }
        swap_numbers(numbers, low, wall);
        return wall;
    }

    private static void swap_numbers(int[] numbers, int index1, int index2)
    {
        int temp = numbers[index1];
        numbers[index1] = numbers[index2];
        numbers[index2] = temp;
    }

}
I will try to finish this part of the assignment as soon as possible so I can move to the next part. That's all for now, thanks for reading!
![]() February 10, 2016 22:36
February 10, 2016 22:36
![]() Blogger
Blogger
CS 2420 - Assignment 3
The Linked List was actually fairly straight forward, but the quicksort gave me the most trouble. Here is my file:
![]() February 1, 2016 17:12
February 1, 2016 17:12
![]() Blogger
Blogger
CS 2420 - Assignment 2
The sorting algorithms gave me the most trouble, but I was able to figure it out. Here is my code:
![]() January 24, 2016 00:25
January 24, 2016 00:25
![]() Blogger
Blogger
CS 2420 - Assignment 1
For the first assignment we had to write a few different functions using Python, which is great because its the language that I am the most familiar with it. Here is what I have:
![]() January 2, 2016 01:19
January 2, 2016 01:19
![]() Blogger
Blogger
2048 Clone in Python
![]() December 21, 2015 17:21
December 21, 2015 17:21
![]() Blogger
Blogger
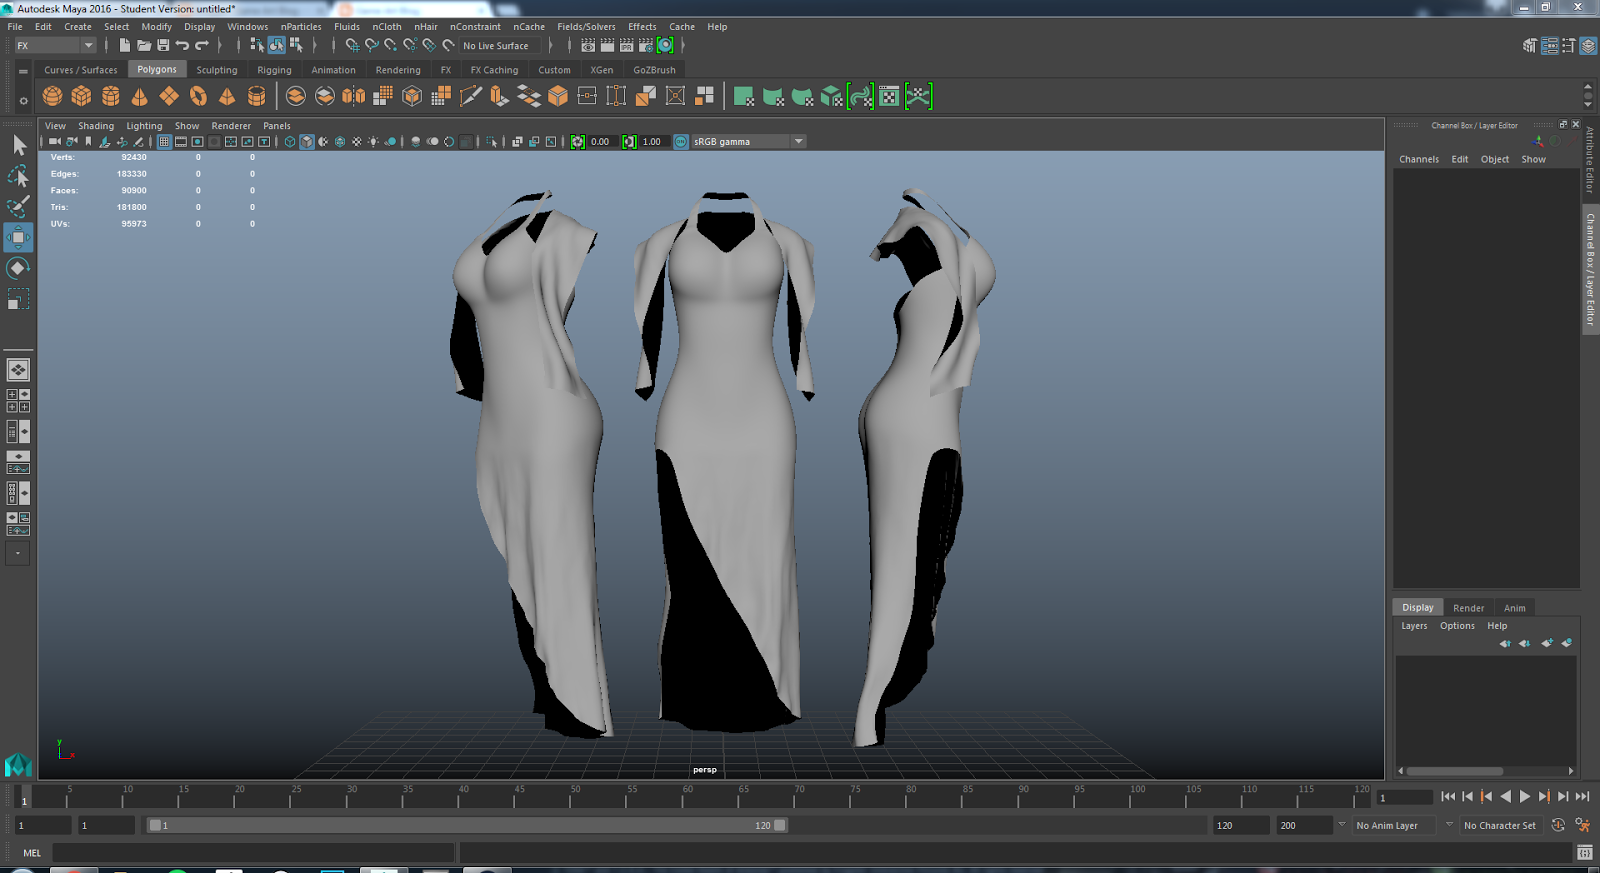
Female 3D Model - Low Polygon Model Done

So today is the due date for my project that I've been blogging about for a few months. As you can see on the screenshot above, I have the low polygon model of both the dress and shawl on the body of my character.
As I said before, I tried to finish the model before so I could make a texture for it, but I ran out of time. I will be going on vacation in a few days, and won't be able to touch my project for about a week. When I come back, I will start working on laying out the UVs and eventually I will texture the model. I still don't know how I want to make the character look, but I think I will go for a stylized look.
My plan is to eventually: texture, bake maps, rig, and make a shader in Unity. I don't know how long it will take me to get all this done, but I think that its a good goal for early 2016.
That's all for now, and have a happy new year (in case I don't post again this year). I don't know how many people (if any) actually read this blog, but thanks for reading!
![]() December 20, 2015 13:47
December 20, 2015 13:47
![]() Blogger
Blogger
Female 3D Model - Shawl Retopology in Topogun

So I did more work on the shawl in ZBrush to get the folds looking the way I want. This time it was really simple since I used my work on the dress to guide my work on the shawl.
I then took the high polygon model into Topogun just like I did with the dress before. This time it was much quicker to get this done, specially since its just one really long rectangle. Now that I am more familiar with the tools, I was able to just start putting points on the model and quickly worked my way around it. Tomorrow is the due date for this assignment, so I don't think that I will have a texture for it by tomorrow. While the texture is not required for the assignment, it was just a personal goal I had.
That's all for now, thanks for reading!
![]() December 17, 2015 13:58
December 17, 2015 13:58
![]() Blogger
Blogger
Female 3D Model - Dress Detail Rework

I went back and tried to add a few more folds, but I wanted to keep it light. I didn't have to worry about doing the retopology again since I didn't change the overall shape of the dress. I don't know if I will get to baking out the normal maps before I turn the assignment in, but since I will continue to work on this project I don't think of this as wasted work. That's all for now, thanks for reading!
![]() December 15, 2015 21:52
December 15, 2015 21:52
![]() Blogger
Blogger
Female 3D Model - Dress Retopology in Topogun

So last week I was talking to a fellow classmate in my class and the subject of retopology came up. I told him that I would do the retopology for my dress in ZBrush. He told me that he would use Topogun and that its super easy to learn.
So today I decided to buy a license, its only $100 so I decided that it was worth it if it was even slightly easier than ZBrush. Well, I can say that it really is super easy. I didn't even watch a tutorial on Topogun and I figured out how to use it. I'm probably not using it to its maximum potential, but I managed to do the retopology for the dress in a couple hours while I learned the software. From here I can just export my work as an Obj and done.
I will work a little more on the shawl and I will also do the retopology in Topogun. Anyways, that's all for now. Thanks for reading!
![]() December 11, 2015 00:45
December 11, 2015 00:45
![]() Blogger
Blogger
Female 3D Model - nCloth for Dress & Shawl
So after trying for a bit to make my dress in Marvelous Designer, I failed. I got a really good basic dress, but it just wasn't turning out how I wanted it. So I have now decided to go back to Maya and do more work with the nCloth system and get a good base dress and shawl that I like.
The above picture is of where I am right now after subdividing the dress a few times and playing with the settings for the simulation on the dress. I had to pin/anchor most of the dress from the hips up, which is why it looks really flat/unchanged on the top and with folds on the bottom.
From here I will take both pieces of cloth into ZBrush and try to do as much as possible there. I also don't have any experience making cloth in ZBrush, but I think that I have more control in ZBrush than I did in Marvelous Designer.
This project is due on December 20th, so I have to hustle and try to finish everything as soon as possible with the sculpt so I can get a texture started. That's all for now, thanks for reading!
![]() December 8, 2015 00:31
December 8, 2015 00:31
![]() Blogger
Blogger
Cloth in Marvelous Designer
 |
| Front View |
 |
| 3/4 View |
 |
| Side View |
![]() December 3, 2015 23:24
December 3, 2015 23:24
![]() Blogger
Blogger
Female 3D Model - Version 1.0 Model Almost Finished


![]() November 20, 2015 01:32
November 20, 2015 01:32
![]() Blogger
Blogger
Female 3D Model - Hair Finished

So I finally managed to finish the hair. I will mention that this was my first true attempt at making hair in Maya, before I never really got this far with a character that I need to do hair. While I learned a lot in the process of making the hair, it took for ever to finish it. I did 4 layers of hair to give it some volume, and it still doesn't quite look the way I thought it would. But for now this is good enough and I won't touch it again.
I also did some work on the dress, but its also not finished yet. Also, earlier today I started to block out a gun holster that she will have on her exposed thigh. I still don't know how I will make it but I know that I will think of something.
For next week I hope to have the holster done and I hope to have started to work on the shoes. While I do know that having female spies in high heels is very cliche, I really like that look and I'm going for it anyways. I will make sure that they are not as ridiculous as stilettos, but my character will be wearing high heels.
That's all for now, thanks for reading!
![]() November 13, 2015 01:37
November 13, 2015 01:37
![]() Blogger
Blogger
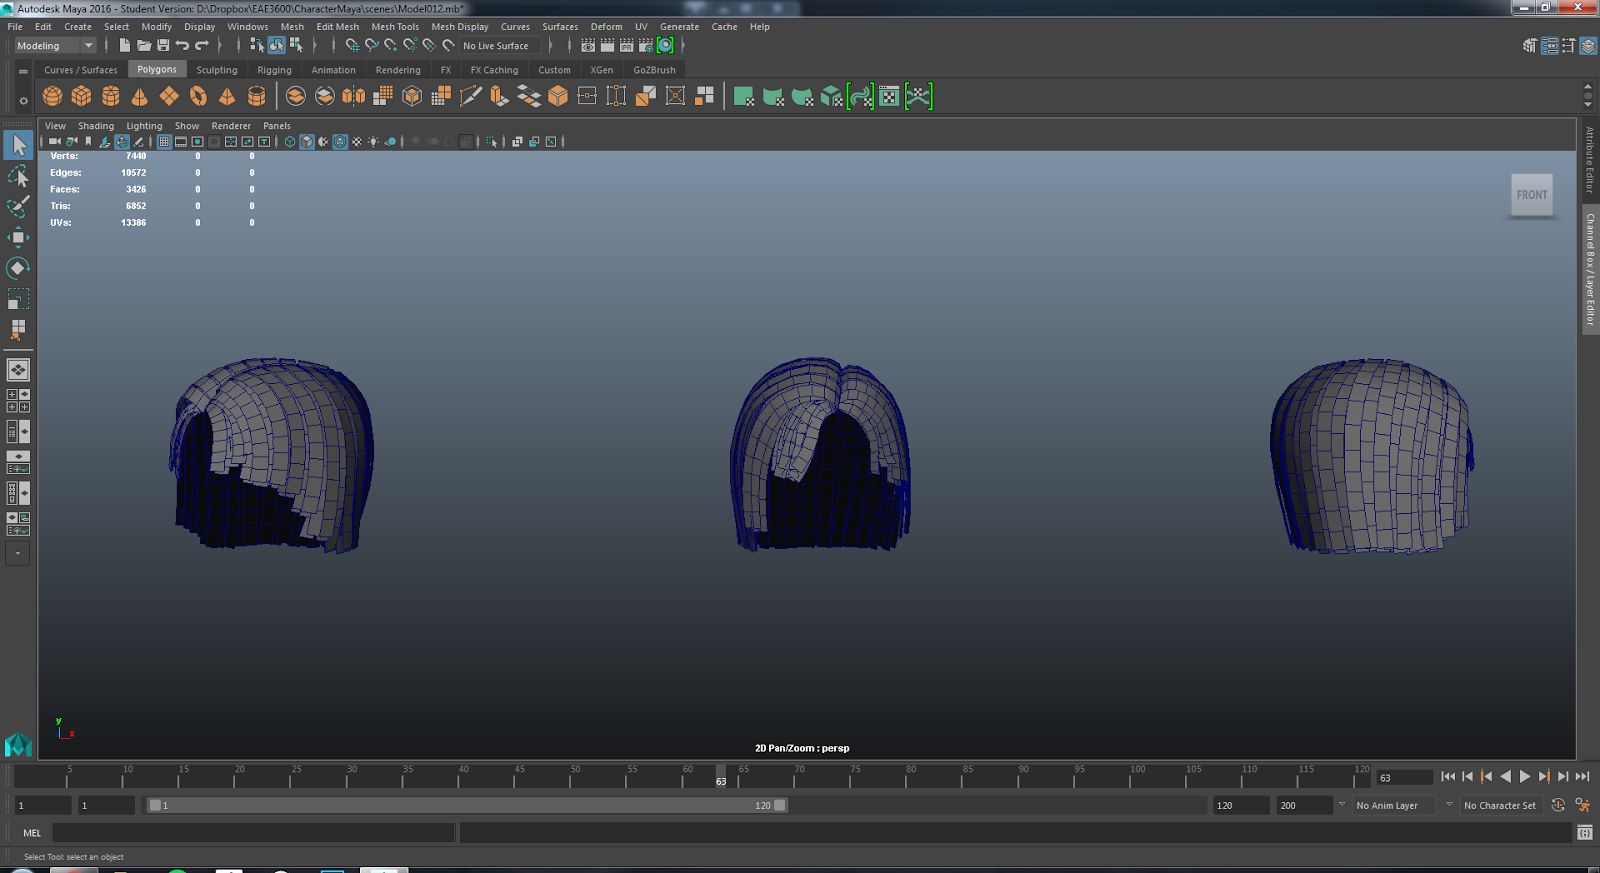
Female 3D Model - Work on Ears and Hair


So since last time I managed to finish the head by attaching the ear to it (see top render). It took me some time to make sure that all the edges would match up.
I have also started to work on the hair, which turns out takes a ton of time to do. What I have been doing is create a curve and then extrude along that curve. This allows me to control how the hair falls, but I also have to do multiple layers to make it have some substance. So far I finished the first layer and I'm about half way done on the send layer.
Hopefully by next week I will finish the hair and start working on the rest of the body. I want to finish the dress and start on the gun holster. Anyways, that's all for now and thanks for reading!
Archive
- September 2016
- August 2016
- June 2016
- May 2016
- April 2016
- March 2016
- February 2016
- January 2016
- December 2015
- November 2015
- October 2015
- September 2015
- August 2015
- July 2015
- June 2015
- May 2015
- April 2015
- March 2015
- February 2015
- January 2015
- November 2014
- October 2014
- September 2014
- August 2014
- June 2014
- May 2014
- April 2014
- March 2014
- February 2014
- January 2014
- December 2013
- November 2013
- October 2013
- September 2013
- August 2013
- July 2013
- June 2013
- May 2013
- April 2013
- March 2013
- February 2013
- January 2013
- December 2012
- November 2012
- October 2012
- September 2012
- August 2012
- April 2012
- March 2012
- February 2012
- January 2012
- December 2011
- November 2011
- October 2011
- September 2011
- August 2011
- March 2011
- February 2011
- January 2011
- December 2010
- November 2010
- October 2010
I am going to be honest here, I had no idea how to start this part of the assignment. At first I thought I was building another Linked List class, but after talking to a friend of mine he got me started on the right direction. He told me that I had to use an array and I had to manually keep track of the items in the array.
I can't just insert items into the array at any index, I have to keep it all together and I have to manage the size of the array as well or use any built in functions. Basically, this is going to be the hardest assignment I've done so far. Here is what I have so far:
So far I have only worked on a couple of functions, most importantly the Add function. This function will append an item to the end of the list, but I still haven't figured out how to manage the size of the array on my own.
That's all for now, thanks for reading!