![]() November 24, 2013 13:52
November 24, 2013 13:52
![]() Blogger
Blogger
My Next Project - Dragon Axe

![]() November 23, 2013 17:06
November 23, 2013 17:06
![]() Blogger
Blogger
Bull Sculpt in Sketchfab
I really like the way it works and that you don't have to have any plug-ins or extra downloads for it to work. I think that I will start to add all my models on my portfolio on Sketchfab soon.
That's all for now, thanks for reading.
![]() November 13, 2013 14:41
November 13, 2013 14:41
![]() Blogger
Blogger
Portfolio Updated - Bull Sculpt Added

You can also find my portfolio at: christian.brushd.com. Now its on to my next project, thanks for reading.
![]() November 11, 2013 15:57
November 11, 2013 15:57
![]() Blogger
Blogger
Bull Head Done!


I did the final render ins Marmoset Tool Bag. I am really happy with the way it turned out, I did this completely in Zbrush only using Maya to fix some topology issued with the low res version of the model and to fix the UVs.
I will also be posting this to Polycount and see what kind of feedback I can get from there. Thanks for reading.
![]() November 11, 2013 01:23
November 11, 2013 01:23
![]() Blogger
Blogger
Bull Head - Diffuse Map Done

Overall I am really pleased with the way it turned out. Now I just need to work on the specular map, and I will be able to render it in Marmoset Tool Bag.
Hopefully I will be able to do it today and post a final render here and on Polycount. Thanks for reading!
![]() November 7, 2013 06:32
November 7, 2013 06:32
![]() Blogger
Blogger
Made With Mischief
Here is some progress in a sketch that I've been thinking about making for a while:

So I know its nothing too amazing, but its my base sketch and I think I like the way its going. What I want to draw is an girl with armor (or bikini, haven't made up my mind yet) like these images of Witchblade. I wanted it to be in the anime/manga art style, and I been taking a lot of inspiration from the League of Legends champion Sona.
I like Sona's long flowing hair and I wanted my girl to have that same hair. I also wanted her to look like a bad ass, so I drew her eye in a way that would imply that she is not afraid of anything. I know that the face is really light, but if you can zoom in you will be able to see what I am talking about.
I made this with a software package that a friend of mine showed me some time ago called Mischief. Essentially its like painting/drawing with vectors, but not in the same style like illustrator. In Mischief there is no predetermined canvas size, and you can zoom in and out with out worrying about the resolution or pixelation of your work.
I've tried to draw in Photoshop before, but I alway need to re adjust my canvas size, or the resolution wasn't set correctly. With Mischief I don't have to worry about that. Right now I am running the free trial, and I have to say that I am really loving it. If you want to know more about this software package, go to madewithmischief.com.
I still need to keep working on this sketch, I don't like the way the feet look and the girl's left arm looks weird on that position. I want it to look like she is folding her arms behind her head, but at that angle with the hair, the arm loos like its part of the hair.
That's all for now, thanks for reading!
![]() November 3, 2013 11:57
November 3, 2013 11:57
![]() Blogger
Blogger
Progress on Polypaint


I still need to finish the color on the ears, a different color for the nose & nose ring, eyes, and another pass at the horns. But overall, I am really liking my progress on my bull.
That's all for now, thanks for reading.
![]() October 27, 2013 12:34
October 27, 2013 12:34
![]() Blogger
Blogger
First Try at Polypainting


![]() October 25, 2013 15:30
October 25, 2013 15:30
![]() Blogger
Blogger
Normal & Ambient Occlusion Map Test


Now that I can see that the UVs turned out ok, I will continue to polypaint. I will have to watch a few tutorial videos, but I'm sure it will be fine. Thanks for reading!
![]() September 21, 2013 12:59
September 21, 2013 12:59
![]() Blogger
Blogger
Quick Start to ZBrush: Volume 2 - Progress
And while I am very pleased on how much progress I have done in the last month, I realized that there is no way I learn a software package as big as ZBrush on my own. So instead of jumping on my next personal project of learning ZBrush on my own, I decided to go back and finish at least another couple of volumes of ZBrush.
Here is a render of my progress so far on Volume 2:


I had to sculpt the base mesh, and use ZRemesher to get a lower resolution mesh with higher resolution on the face and the hands.
That's all for now, thanks for reading!
![]() September 15, 2013 04:38
September 15, 2013 04:38
![]() Blogger
Blogger
Final Render of Bull's Head Sculpt


- I changed the horns, since I realized that they were pointing straight and they should be up at an angle with some curvature.
- I added a nose ring, I thought that it was appropriate and added character to the sculpt.
- I removed the skin flap under the mouth. I was thinking of making it hair, but I gave up on that idea.
![]() September 10, 2013 13:32
September 10, 2013 13:32
![]() Blogger
Blogger
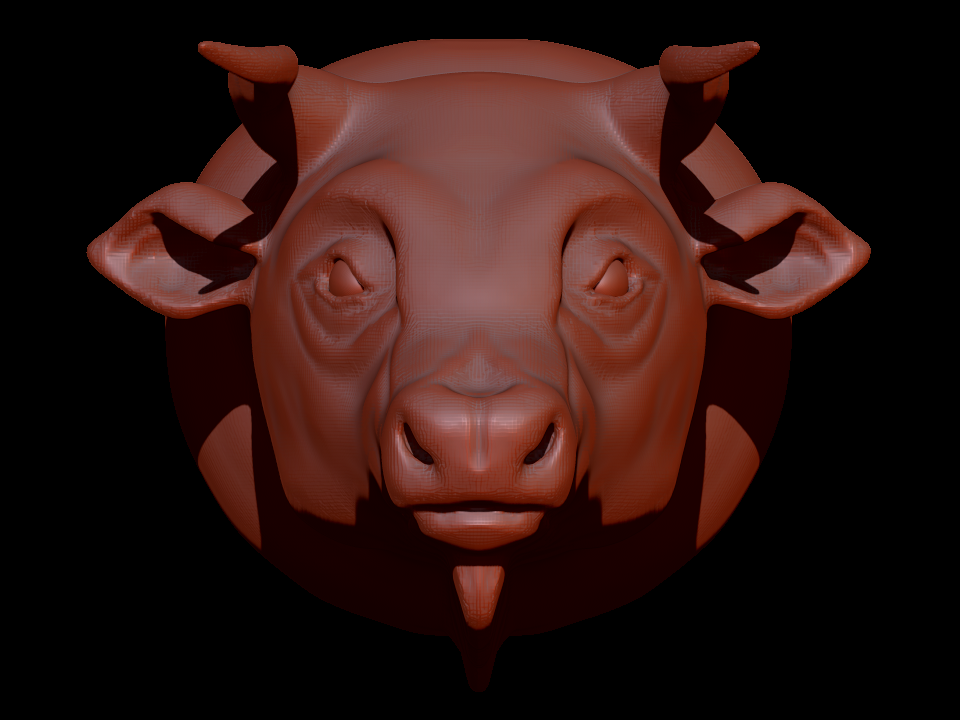
Bull Head Sculpt WIP
After a few hours of sculpting here is my progress so far:


![]() September 1, 2013 04:35
September 1, 2013 04:35
![]() Blogger
Blogger
Werewolf Head Sculpt
Here are the renders:


![]() August 16, 2013 04:05
August 16, 2013 04:05
![]() Blogger
Blogger
2nd Head Sculpt
Hopefully, once I'm on my 15th sculpt, I will be much faster and much better than what I am today.
Here are the renders for today's work:


Yesterday I did the sculpt without reference, and I it turned out horrible because of it. I tried to see how well I could do if I just left it up to my imagination.
Anyways, I've learned my lesson and for today's sculpt I followed this YouTube video:
It isn't a step-by-step video, its a quick rendering of an artist work into a 15 minute video. I paused and rewind the video as many times as I need to see how the artist was doing his work. I learned some really cool tricks and a different way to start a head sculpt.
For tomorrow I will try to find a woman's head that I can sculpt, and maybe even add hair! :O Well, that's all for now, thanks for reading!
![]() August 15, 2013 16:02
August 15, 2013 16:02
![]() Blogger
Blogger
30 Head Sculpts in a Month Challenge
My friend Brandon Rees is now a tech artist for EA Tiburon, and he gave me this great idea. He said that I should take no more than an hour per sculpt, after a while what used to take me 20 minutes to do will be done in half the time.
I will have to admit that I cheated on this head sculpt since I spent almost 2 hours doing it. I know that it looks really crappy for 2 hours worth of work, but it took me a while to figure dinamesh and all that set up stuff. Anyways, here are the renders from ZBrush:


Archive
- September 2016
- August 2016
- June 2016
- May 2016
- April 2016
- March 2016
- February 2016
- January 2016
- December 2015
- November 2015
- October 2015
- September 2015
- August 2015
- July 2015
- June 2015
- May 2015
- April 2015
- March 2015
- February 2015
- January 2015
- November 2014
- October 2014
- September 2014
- August 2014
- June 2014
- May 2014
- April 2014
- March 2014
- February 2014
- January 2014
- December 2013
- November 2013
- October 2013
- September 2013
- August 2013
- July 2013
- June 2013
- May 2013
- April 2013
- March 2013
- February 2013
- January 2013
- December 2012
- November 2012
- October 2012
- September 2012
- August 2012
- April 2012
- March 2012
- February 2012
- January 2012
- December 2011
- November 2011
- October 2011
- September 2011
- August 2011
- March 2011
- February 2011
- January 2011
- December 2010
- November 2010
- October 2010